
Search for articles...
Search for articles...
A quick guide to using your own domains on the Granite cloud platform.
Every app you deploy on Granite comes with a free platform subdomain (for example, your-app.novps.app). That's perfect for testing, but for anything you want to show to real users you'll want your own domain — something like app.your-company.com or your-company.com.
Granite connects custom domains through a standard CNAME record. You keep your domain wherever it's registered, add one DNS record that points to Granite, and the platform automatically issues an SSL certificate and starts serving your app on that address. No servers to configure, no certificates to renew manually.
This guide walks you through the whole process, one screen at a time.
You'll need:
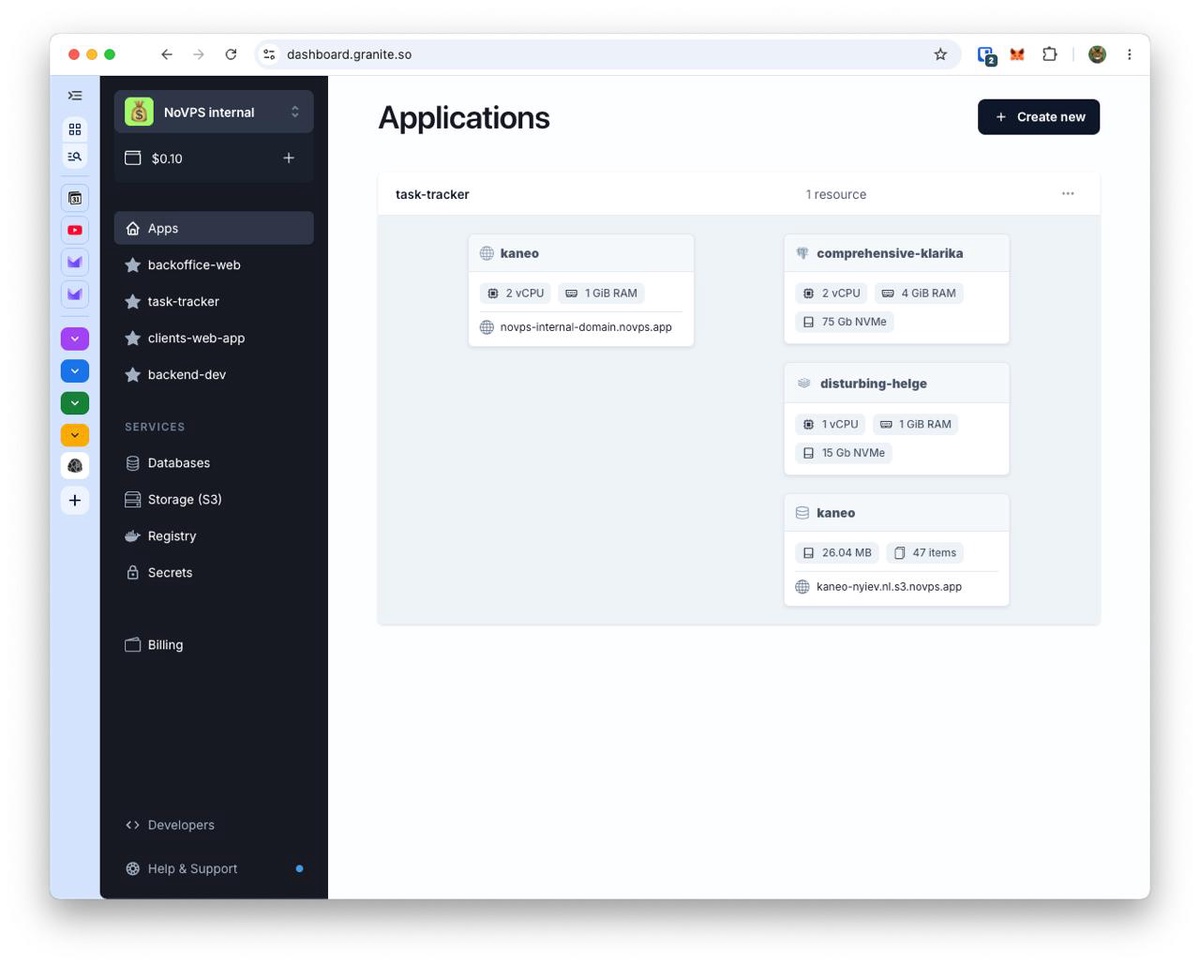
From the Applications page, find the app you want to attach the domain to and click it. In this example we're using the kaneo web app.
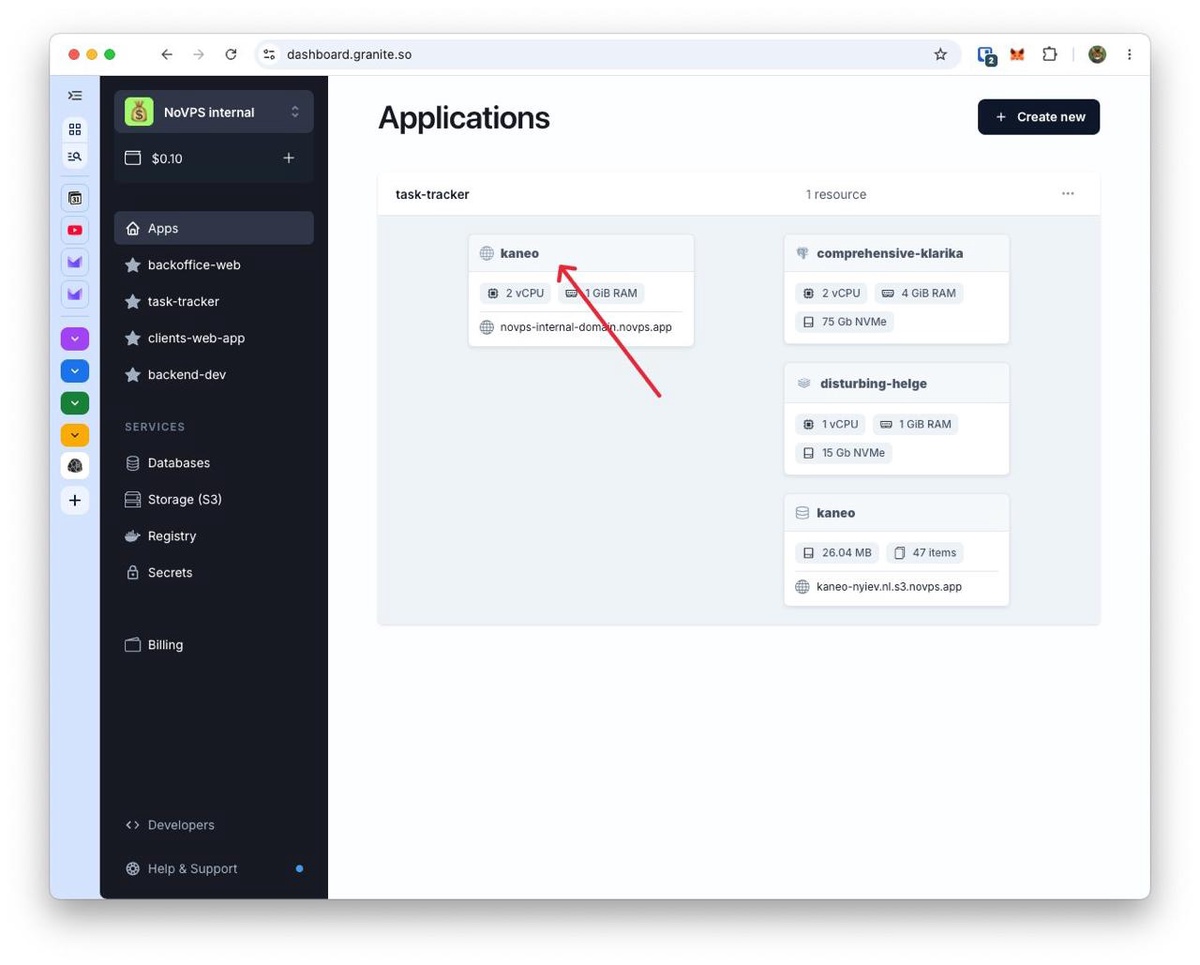
Inside the app, you'll see a row of tabs: Overview, Insights, Activity, Logs, Console, Settings. Click Settings.
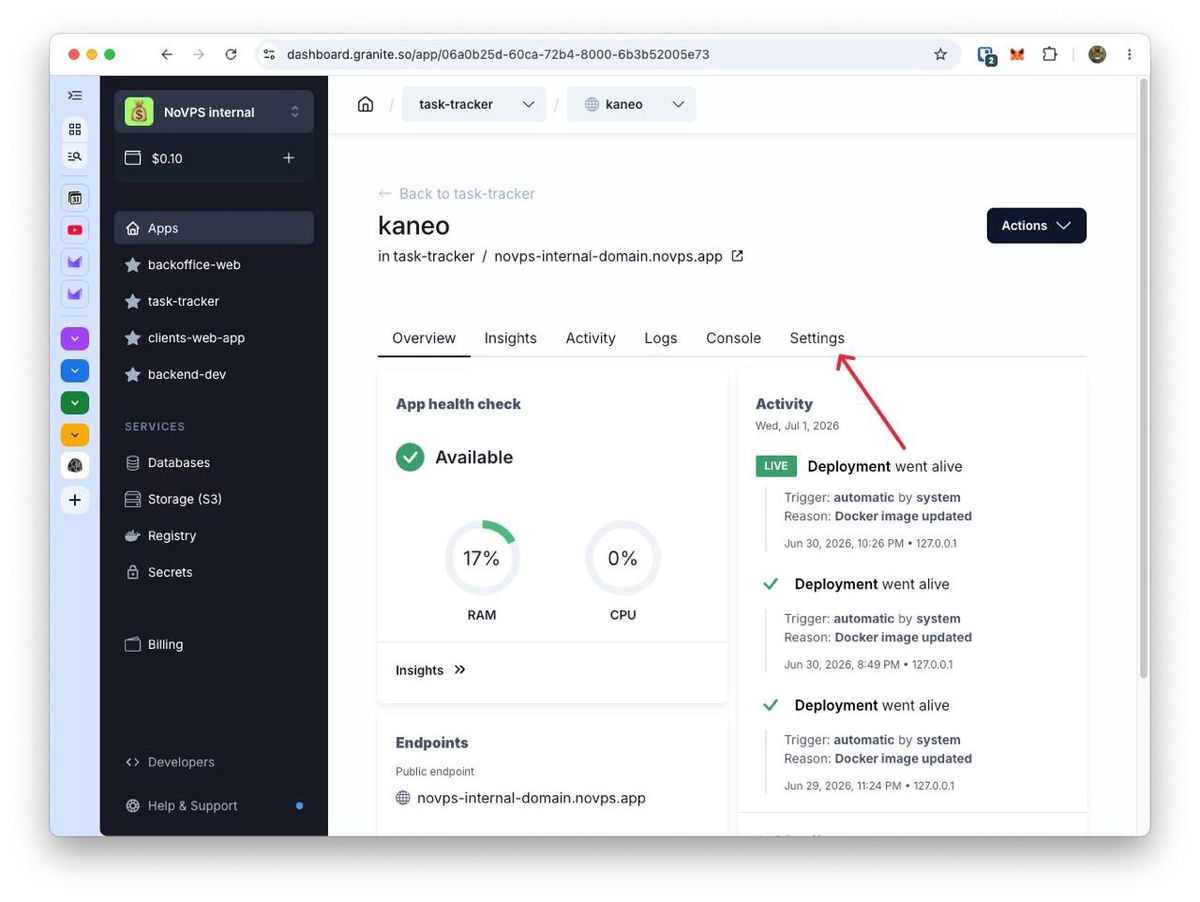
Scroll to the Domain row. It currently shows only your platform domain (…novps.app). Click Edit on the right.
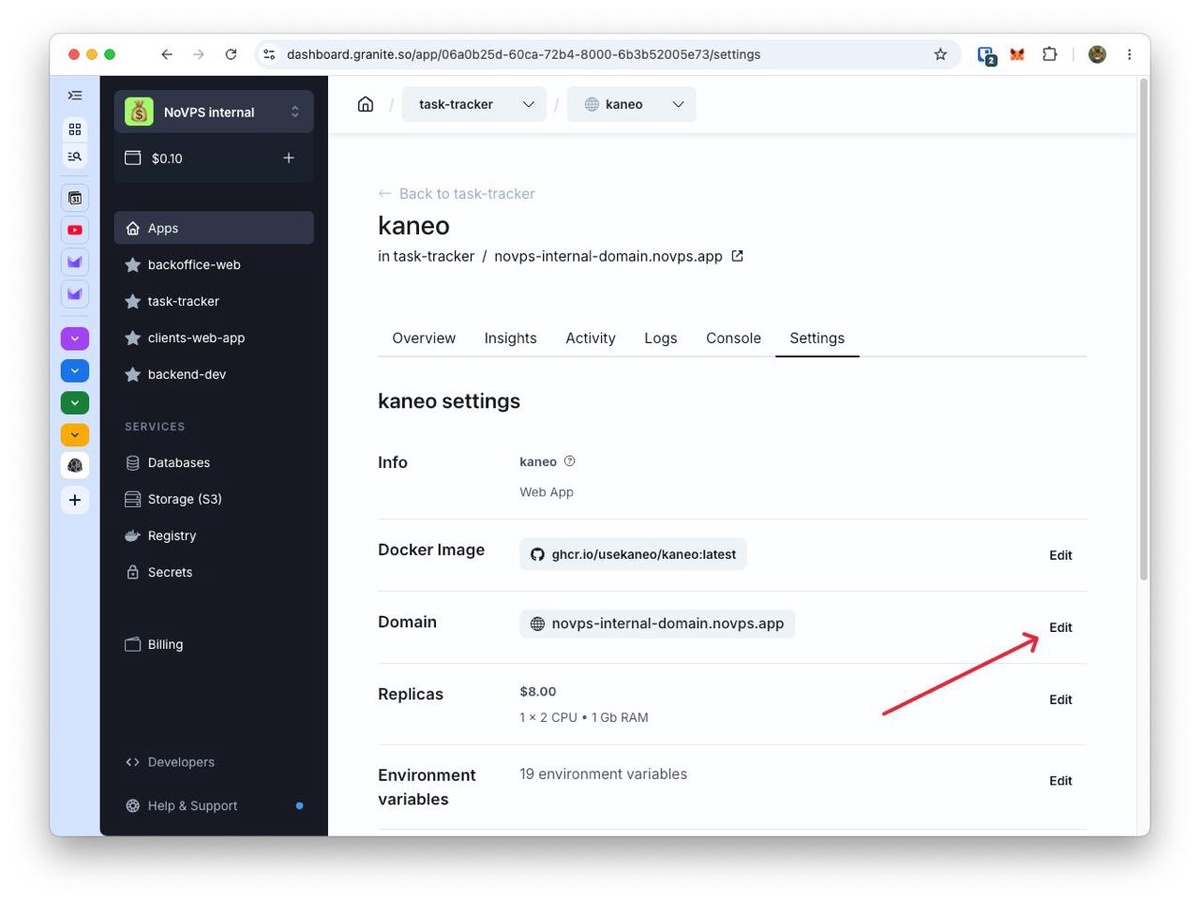
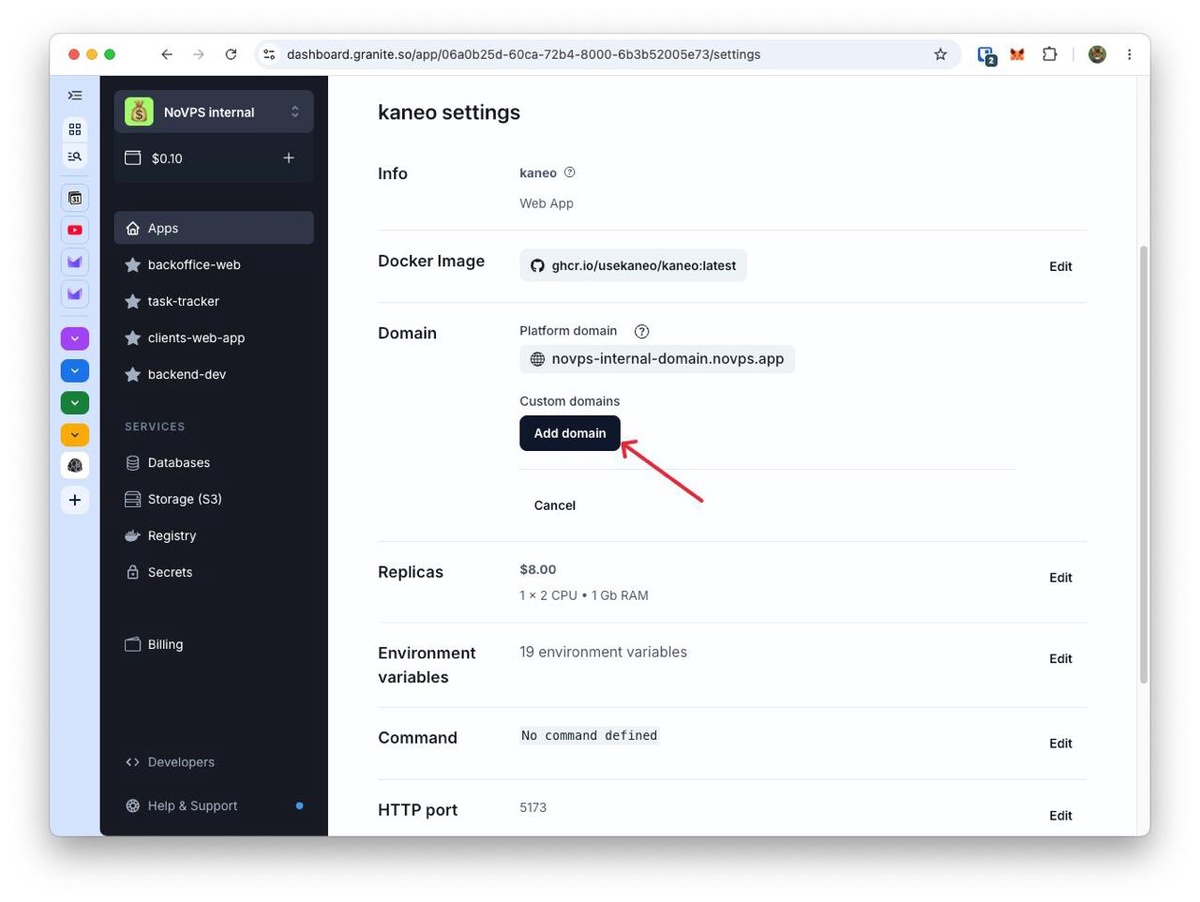
The section expands to show your Platform domain and a Custom domains area. Click Add domain.
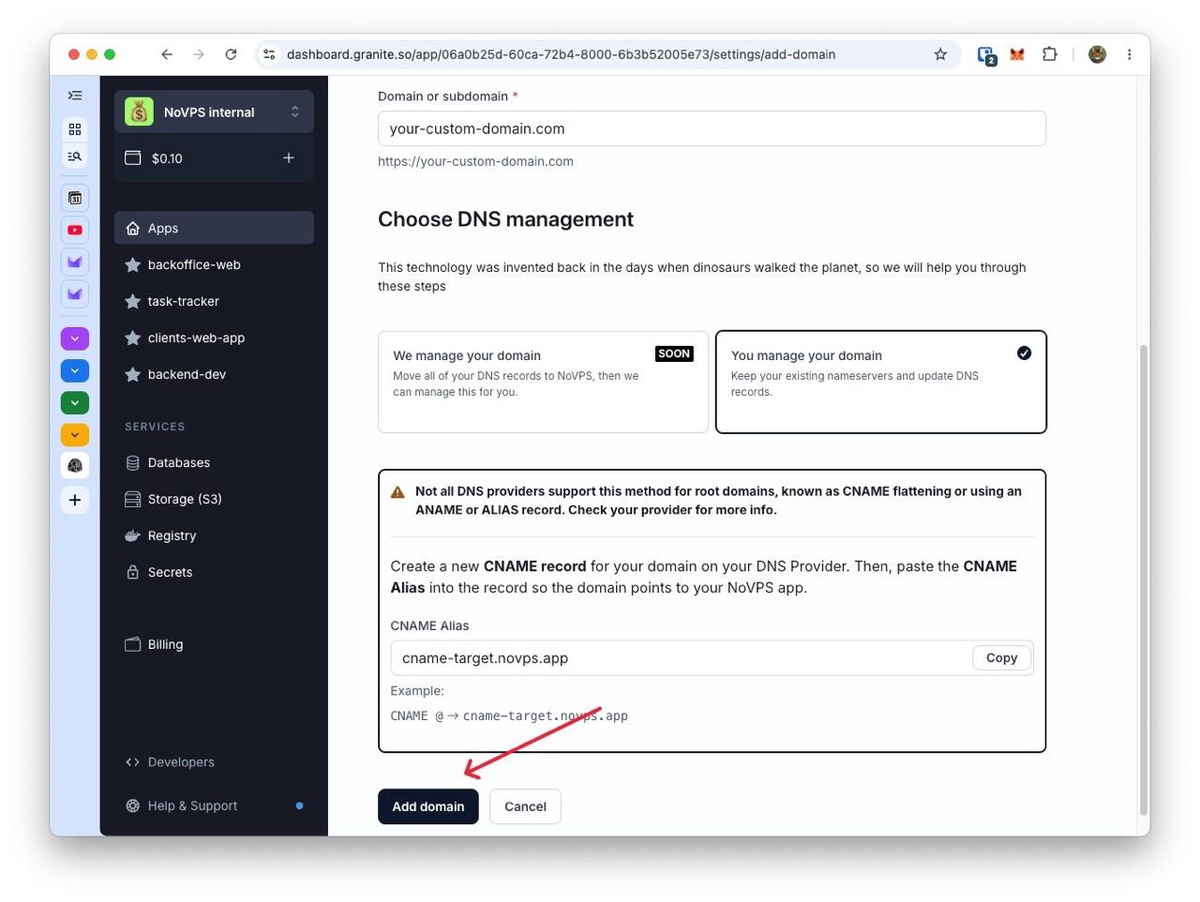
On the Add domain to kaneo screen, type the domain or subdomain you want to use into the Domain or subdomain field — for example your-custom-domain.com or app.your-company.com.
The Add domain button stays disabled until you've entered a valid value.
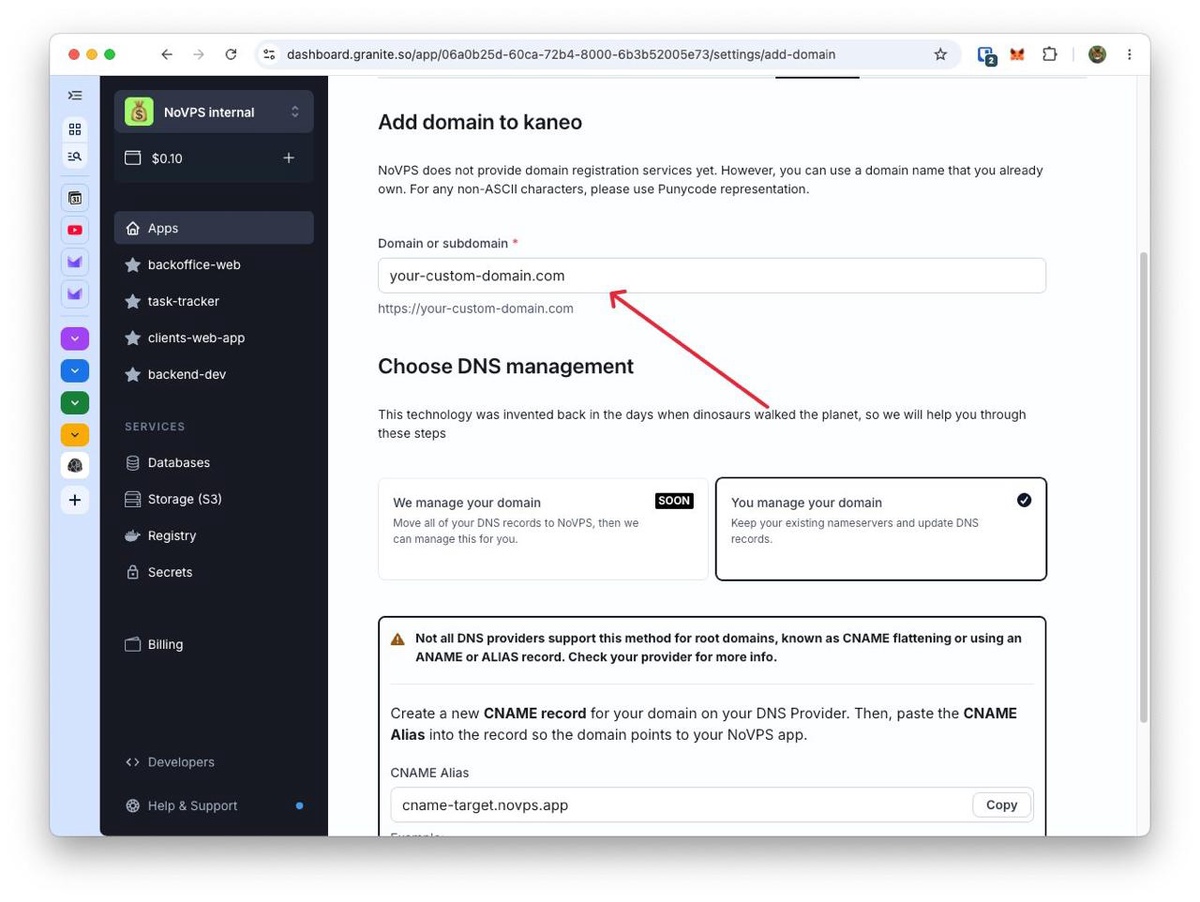
Once you've entered a domain, the Choose DNS management section appears with two options:
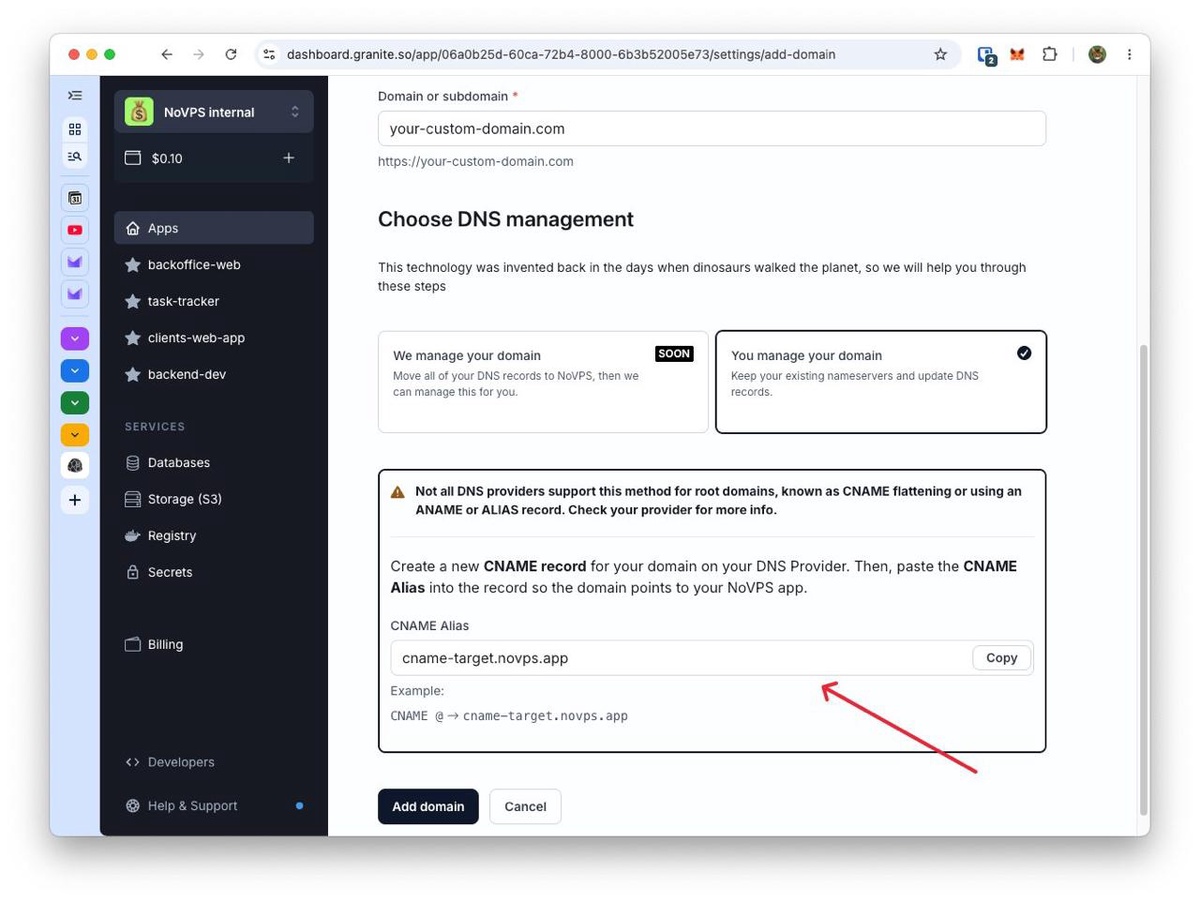
Granite shows you a CNAME Alias (something like cname-target.novps.app). This is the value your domain needs to point at. Click Copy to grab it.
Root domain vs. subdomain. Pointing a subdomain (likeapp.your-company.com) at a CNAME always works. Pointing a root/apex domain (likeyour-company.com) requires your DNS provider to support CNAME flattening, also known as ANAME or ALIAS records. Most modern providers (Cloudflare, Namecheap, Porkbun, DNSimple) support this; some older ones don't. Check your provider if you're using a root domain.
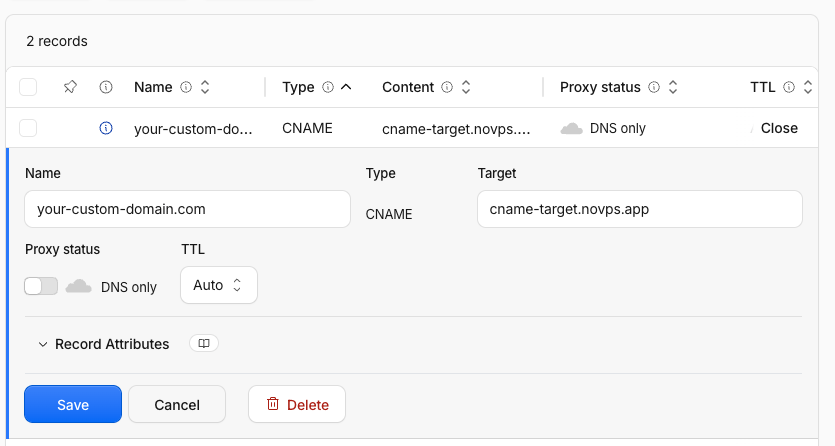
Go to your DNS provider and create a new CNAME record:
Example: CNAME @ → cname-target.novps.app
Back on the Add domain screen, click Add domain to save.
Your custom domain now appears under Custom domains with a Not ready status and a spinner.
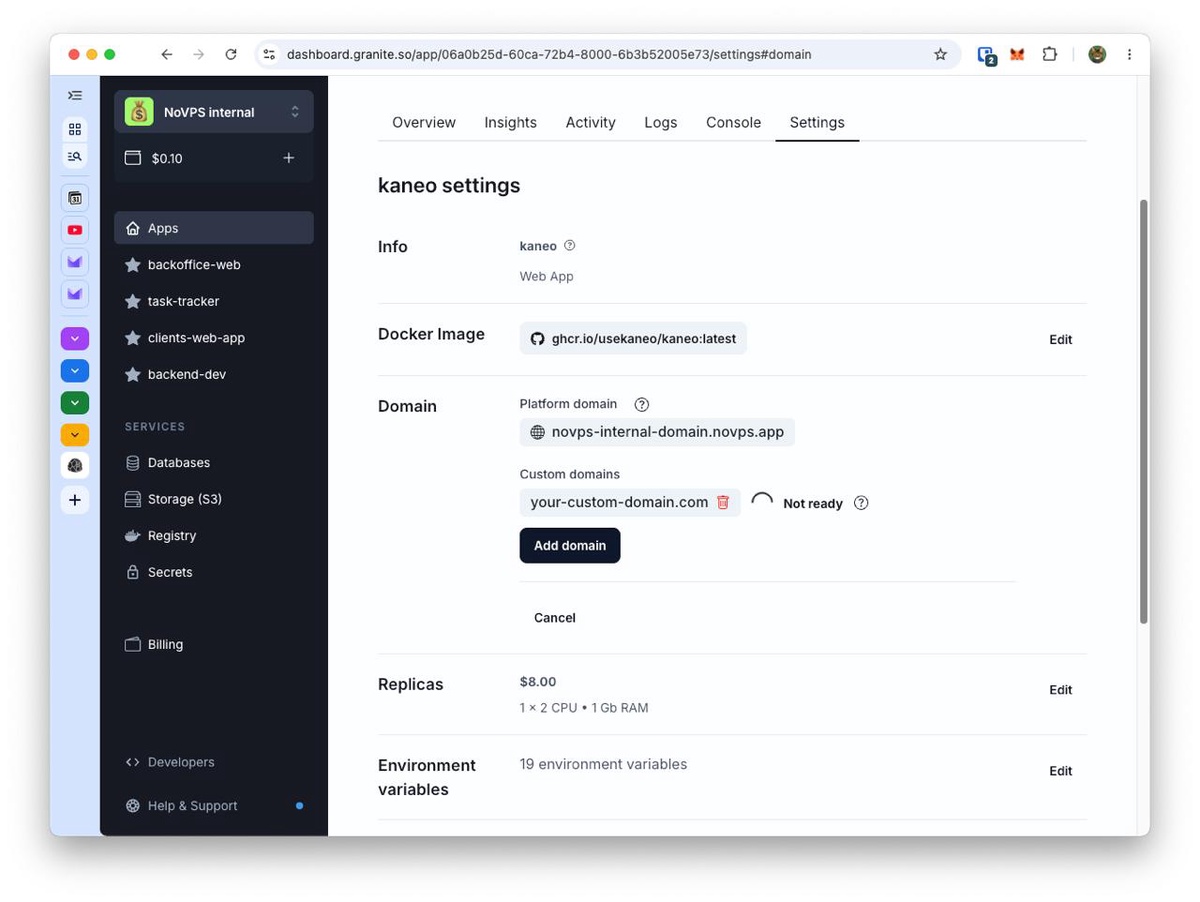
Not ready means Granite doesn't yet see a correct CNAME record for your domain. This is normal right after you add it — DNS changes take time to propagate, and Granite re-checks periodically.
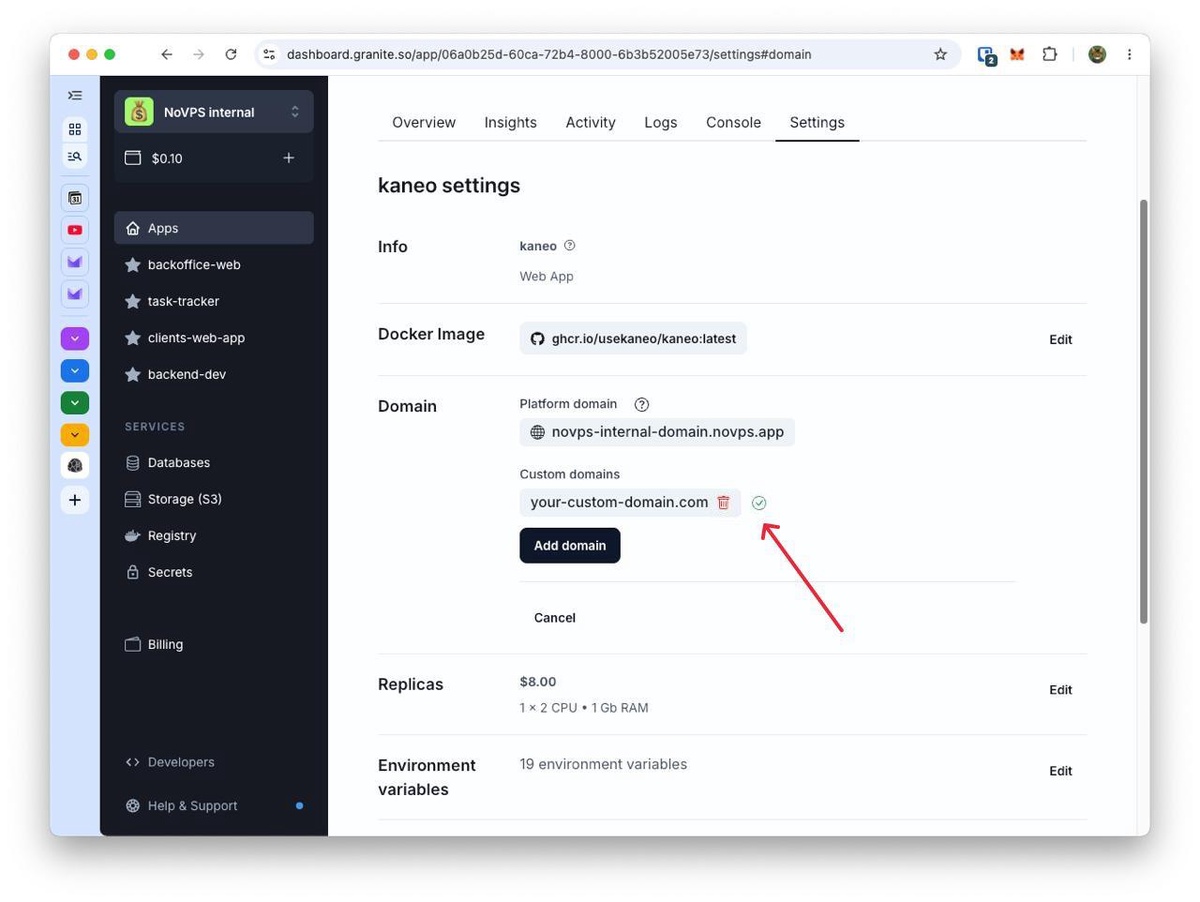
When the status turns into a green checkmark (Ready), Granite has detected the correct CNAME record and started connecting the domain — provisioning the SSL certificate and routing traffic to your app.
How long does it take?
If it doesn't come up: If you've set the correct CNAME record but the domain stays unreachable for an extended time, contact Support — we'll take a look.
That's it — your app is now live on your own domain with automatic HTTPS.