
How to create a bucket
Step-by-step instructions on how to create an S3 bucket in Granite and choose its access policy
To create a bucket on the Granite cloud platform, you need to have an account and a Project. If you need step-by-step instructions on how to create a project in the Granite cloud platform, you can find them here.
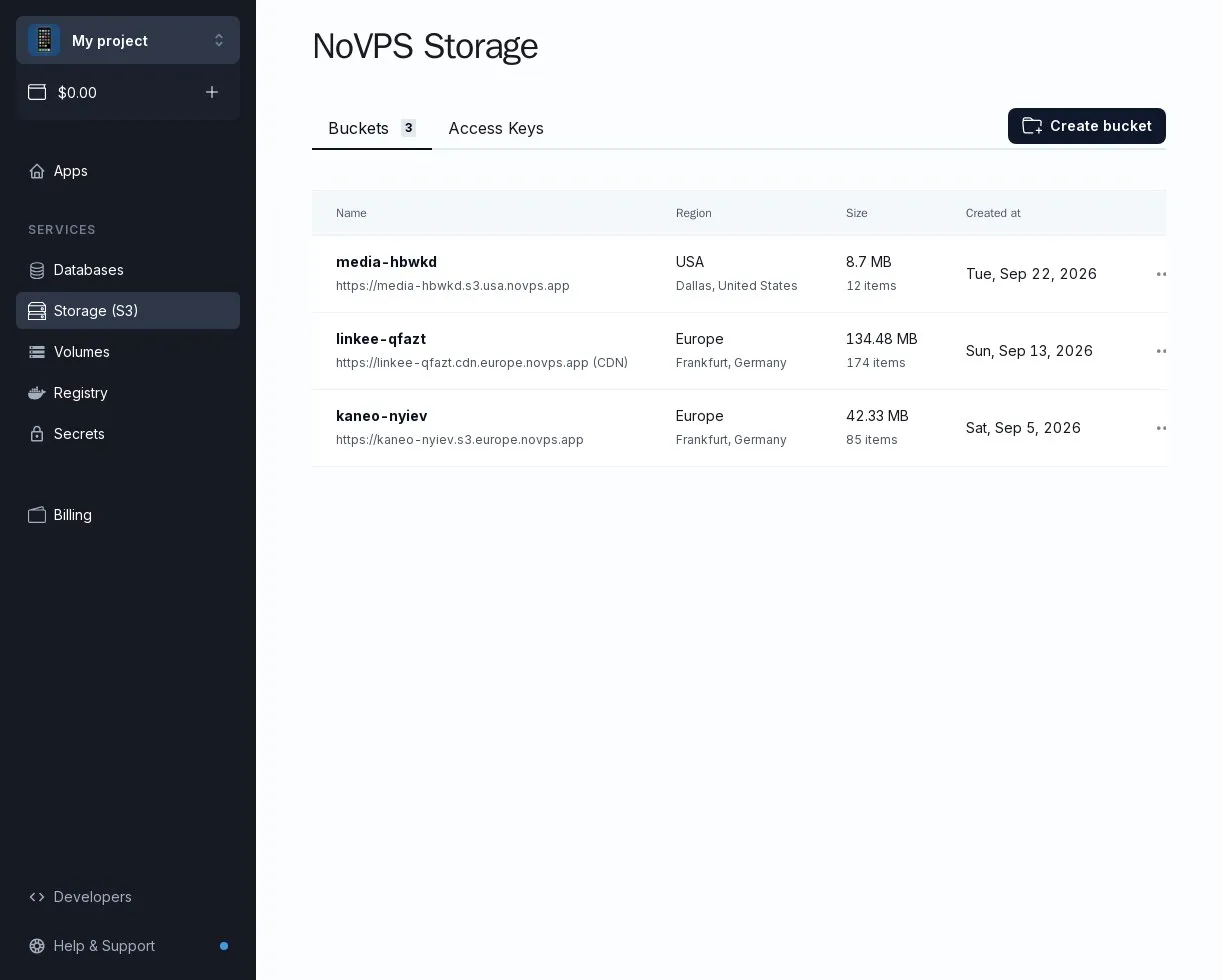
- Select the Storage (S3) section in the menu. You will see the list of buckets in the current project with the address, region, size and number of objects for each one.
-
Click the Create bucket button.
-
Choose the region: Europe (Frankfurt, Germany), USA (Dallas, United States) or Asia (Tokyo, Japan). Pick the one closest to your application and your users; the region cannot be changed later. See Regions.
-
Enter the bucket name. The name must be in lowercase, between 3 and 40 characters long, and may contain latin letters, digits and dashes. A short suffix is appended automatically to guarantee uniqueness; the resulting identifier, for example
kaneo-nyiev, is what you will use in S3 clients.
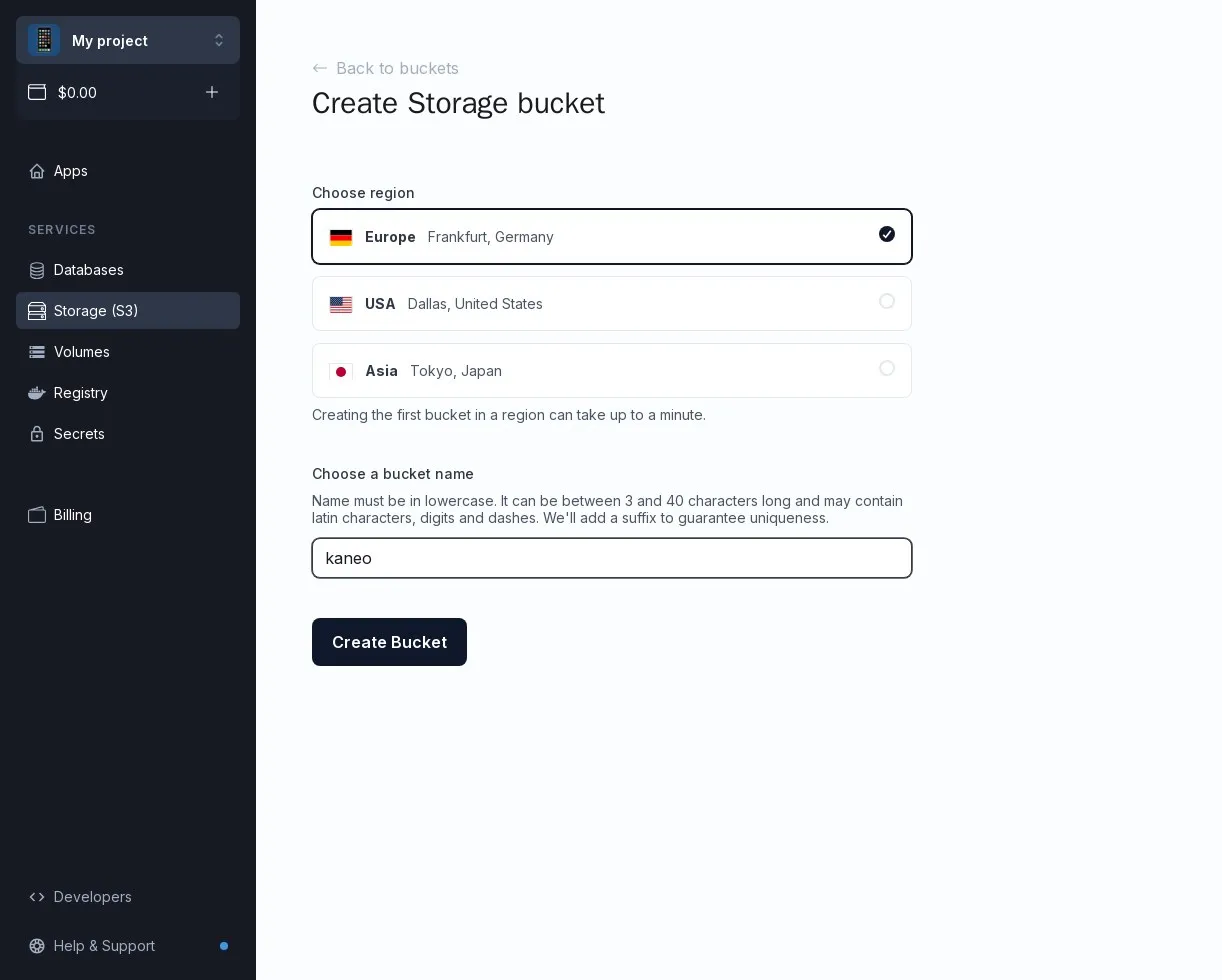
- Click the Create Bucket button. The new bucket appears in the list and is ready to use. A new bucket is Private: nothing is served without an access key.
Creating the first bucket of a project in a region can take up to a minute. The next buckets in the same region are created instantly.
If the Create bucket button is disabled, your role in the project does not allow creating buckets. Please contact the project owner.
Changing the access policy
If the files in the bucket should be publicly readable, for example images or static assets served to browsers, change the access policy:
- Open the bucket and click Settings.
- In the Access policy section click Edit and choose Read-only public: anyone can download files through the bucket’s CDN URL, while everything else still requires a key.
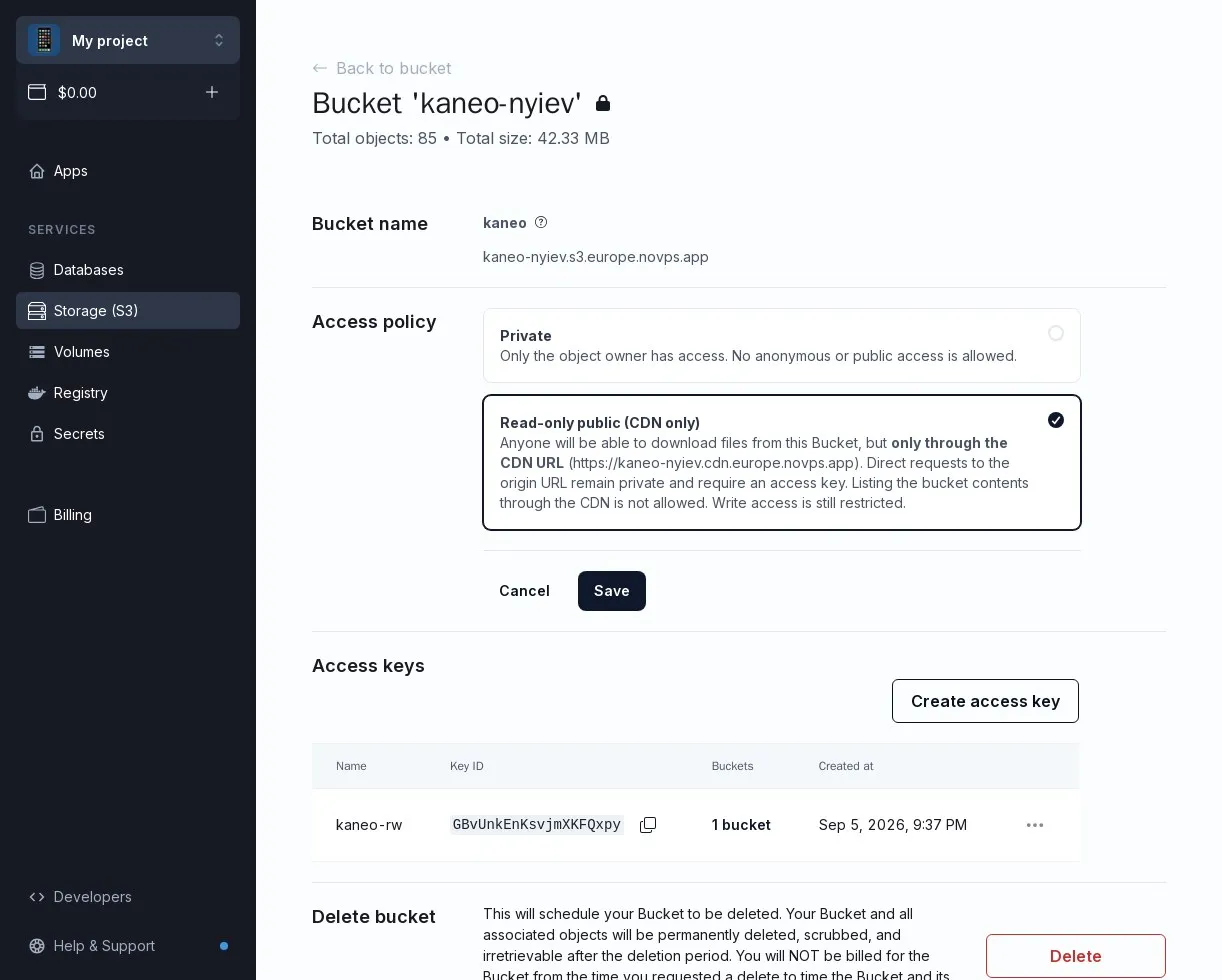
- Click Save. The CDN is ready within a few minutes; after that each file is available at
https://<identifier>.cdn.<region>.novps.app/<key>.
Public files are served only through the CDN URL. The origin URL (<identifier>.s3.<region>.novps.app) stays private and answers only requests signed with an access key.
Congratulations! Your bucket has been created. The next step is to create an access key and upload files.