
How to upload and access files
Use the built-in file browser, create an access key, connect an S3 client or the AWS SDK, and serve files over the CDN
This guide assumes you already have a bucket.
Using the file browser
Open the Storage (S3) section and click the bucket. The bucket page shows its Origin URL and CDN URL, and below them the files and folders it contains.
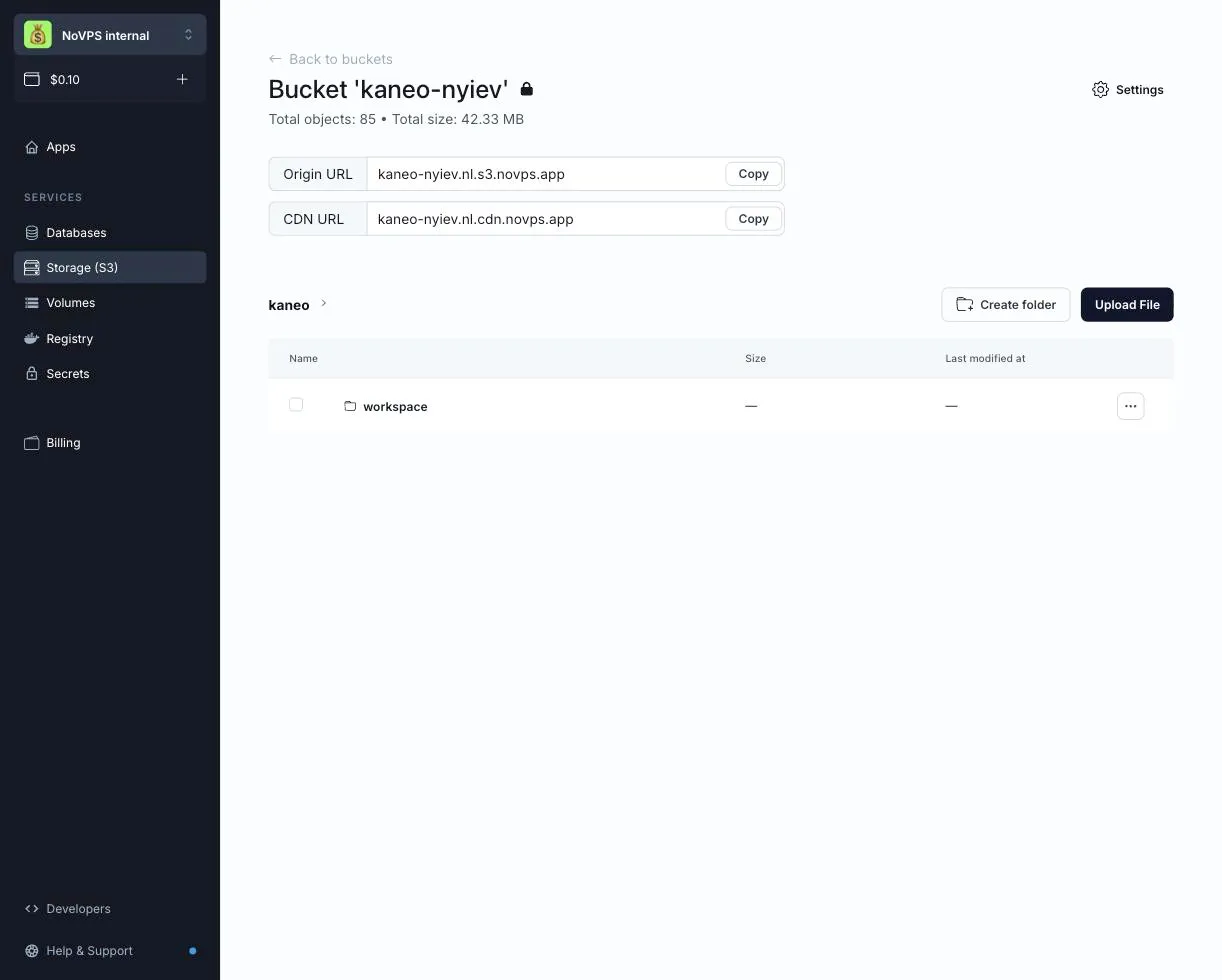
- Upload File uploads one file into the current folder.
- Create folder creates a folder; click a folder name to enter it and use the breadcrumbs at the top to go back.
- The ⋯ menu on a file offers Download, Quick share, Rename, Move to and Delete. In a Read-only public bucket it also offers Copy public CDN URL. For a folder it offers Rename, Move to and Remove.
- Tick several items to Move to another folder or Delete them at once.
Quick share generates a temporary link to a file in a private bucket. Choose how long the link stays valid (1 hour, 6 hours, 1 day, 3 days or 7 days) and copy either the path-style or the virtual-host-style URL. Anyone with the link can download the file until it expires, even if the bucket is private.
Creating an access key
Applications and S3 clients authenticate with an access key.
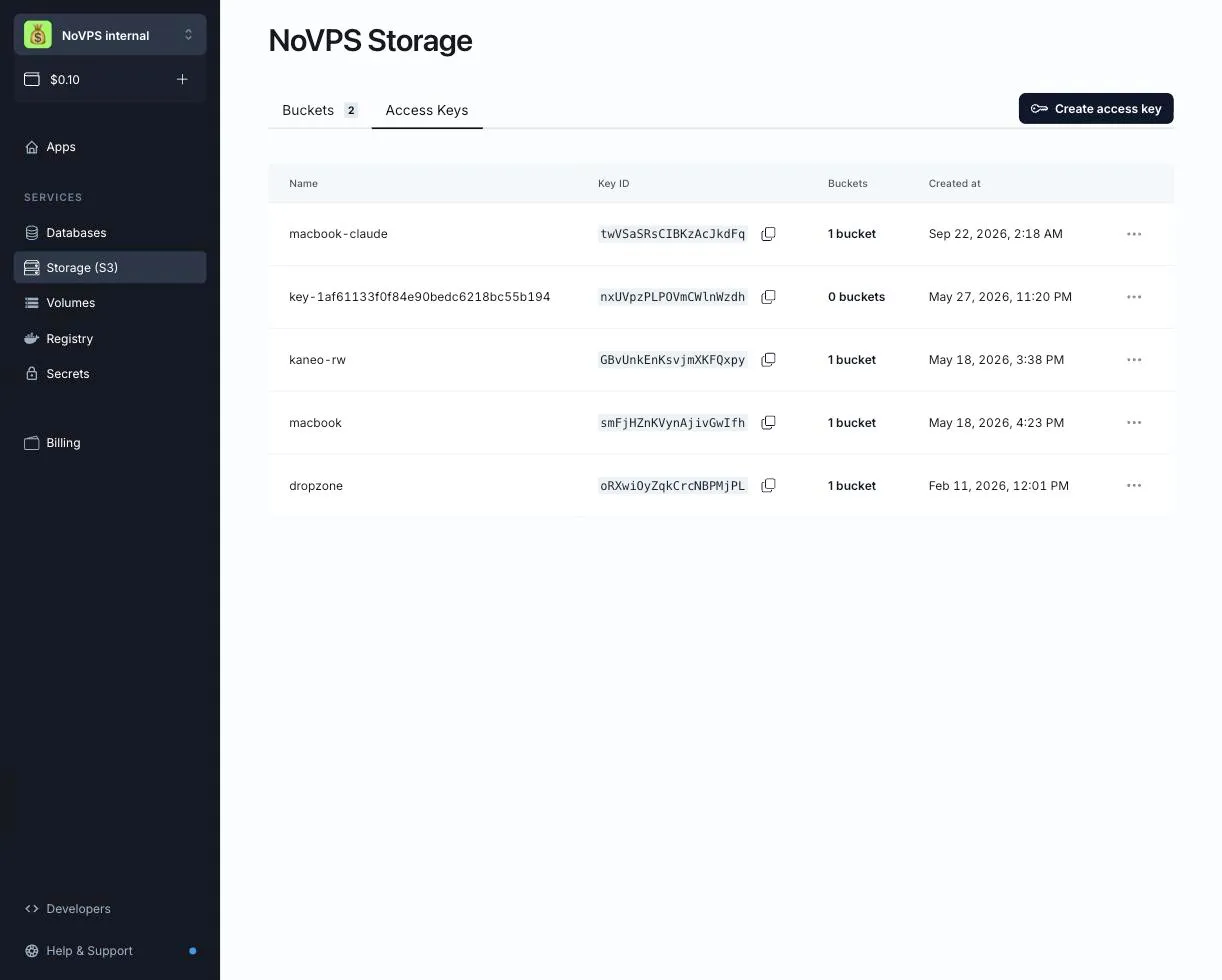
- Open the Storage (S3) section and switch to the Access Keys tab.
-
Click Create access key.
-
Enter a key name. It can only contain alphanumeric characters, dashes and periods.
-
Under Key permissions, tick the buckets this key should have access to and pick a permission level: Read-only or Read/write/delete. All buckets of a key must be in the same region and share the same permission level; buckets that cannot be added to the current selection are greyed out. For another region or another permission level, create a separate key.
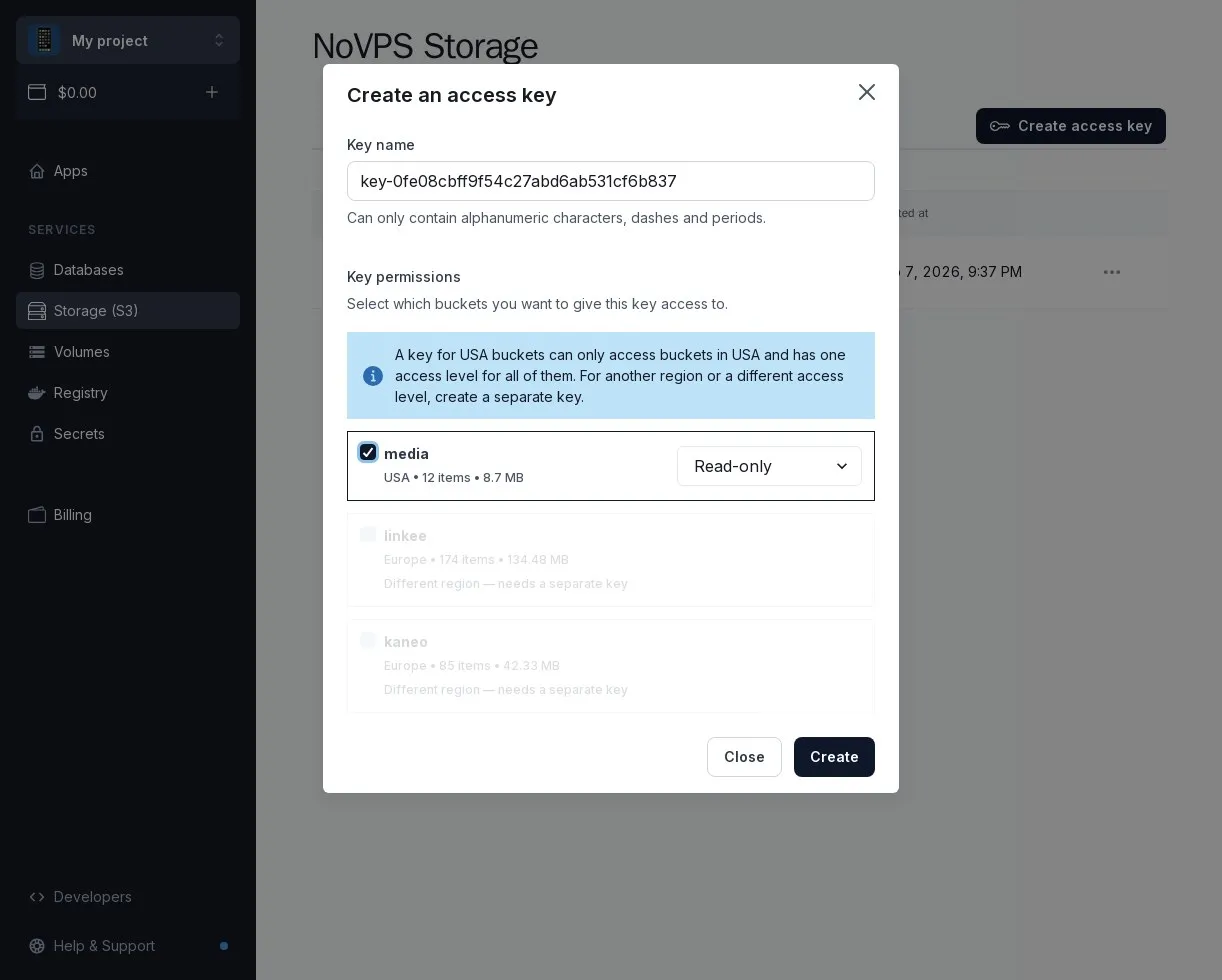
- Click Create. The dialog shows the Key ID and the Secret key.
Save the secret key securely right away. It is shown only once and cannot be viewed after you close the window. If you lose it, use Regenerate key in the key’s menu to get new credentials; the old ones stop working immediately.
Regenerating a key, or changing which buckets it covers or its permission level, issues a new Key ID as well as a new secret key. The dialog shows both once; update your applications with the new pair right away.
The Key ID is also shown in the Access Keys list and can be copied from there at any time. Pass the Key ID and the secret to your application as secrets rather than committing them to the repository.
Connecting an S3 client
Any tool or library that speaks the S3 API works: the AWS SDK for your language, the AWS CLI, s3cmd, rclone, and the storage adapters that ship with Laravel, Django, Rails and other frameworks. Three settings are needed:
| Setting | Value |
|---|---|
| Endpoint | The S3 endpoint of the bucket’s region (see below) |
| Access key / secret | The Key ID and secret key of your access key |
| Bucket | The bucket identifier, for example kaneo-nyiev |
| Region | Endpoint |
|---|---|
| Europe | https://s3.europe.novps.app |
| USA | https://s3.usa.novps.app |
| Asia | https://s3.asia.novps.app |
| EU (Netherlands), legacy | https://nl.s3.novps.app |
Both path-style (https://s3.europe.novps.app/<bucket>/<key>) and virtual-host-style (https://<bucket>.s3.europe.novps.app/<key>) addressing are supported. If your client requires a region name, use us-east-1; it works for every region.
With the AWS CLI:
aws configure set aws_access_key_id <KEY_ID>aws configure set aws_secret_access_key <SECRET_KEY>aws configure set region us-east-1
aws --endpoint-url https://s3.europe.novps.app s3 cp ./photo.jpg s3://kaneo-nyiev/uploads/photo.jpgaws --endpoint-url https://s3.europe.novps.app s3 ls s3://kaneo-nyiev/uploads/
With boto3 in Python:
import boto3
s3 = boto3.client(    "s3",    endpoint_url="https://s3.europe.novps.app",    aws_access_key_id="<KEY_ID>",    aws_secret_access_key="<SECRET_KEY>",    region_name="us-east-1",)s3.upload_file("./photo.jpg", "kaneo-nyiev", "uploads/photo.jpg")
The NoVPS CLI can also list, upload, download, rename and delete files without an access key, using your personal access token: see the novps storage files commands.
Serving files publicly
If the bucket’s access policy is Read-only public, every object is available to anyone at its CDN URL:
https://<bucket>.cdn.<region>.novps.app/<key>for example https://kaneo-nyiev.cdn.europe.novps.app/uploads/photo.jpg. The file browser builds this link for you: ⋯ → Copy public CDN URL. Special characters in the key, such as spaces, must be percent-encoded in the URL.
Use the CDN URL in your pages and apps: the file is delivered from a node close to the visitor.
Public files are served only through the CDN URL. The origin URL https://<bucket>.s3.<region>.novps.app/<key> does not serve files anonymously, even in a public bucket; it answers only requests signed with an access key. Listing the bucket through the CDN is not possible either.
In the legacy EU (Netherlands) region, public files are served by both https://<bucket>.nl.cdn.novps.app/<key> and the origin URL https://<bucket>.nl.s3.novps.app/<key>.
For a Private bucket, nothing is served without credentials. Use Quick share in the file browser or generate a pre-signed URL from your application with the S3 SDK to give temporary access to a single file.