
How to push an image to the registry
Create an access key, log in with Docker, tag and push an image, and deploy it to an application
This guide assumes you already have a namespace and a Docker image built locally or in CI.
Step 1. Create an access key
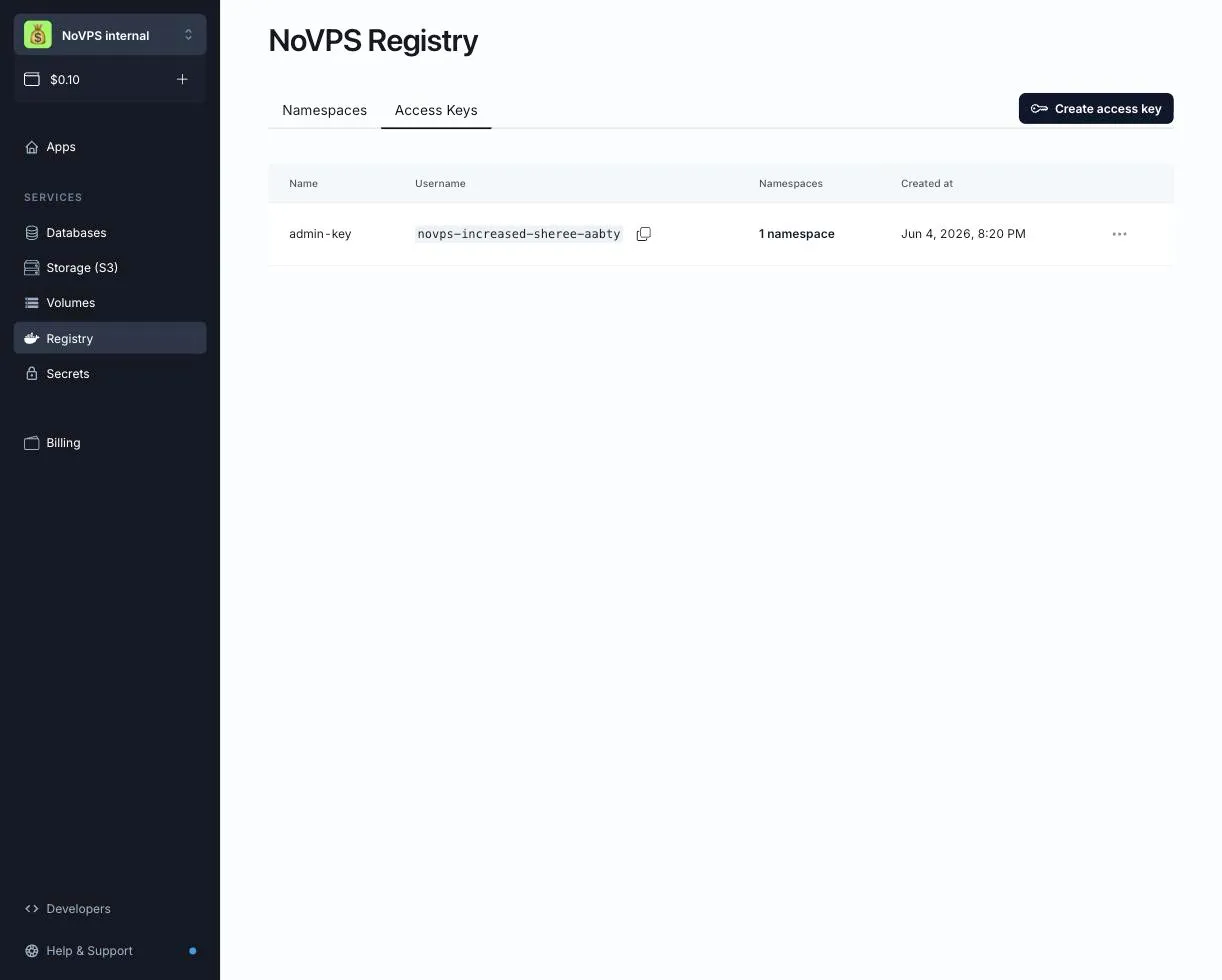
- Open the Registry section and switch to the Access Keys tab.
-
Click Create access key.
-
Enter a key name. It can only contain alphanumeric characters, dashes and periods.
-
Under Key permissions, tick the namespaces this key should have access to and pick a permission level for each one: Pull-only, Push-only or Full access. To push images, choose Push-only or Full access.
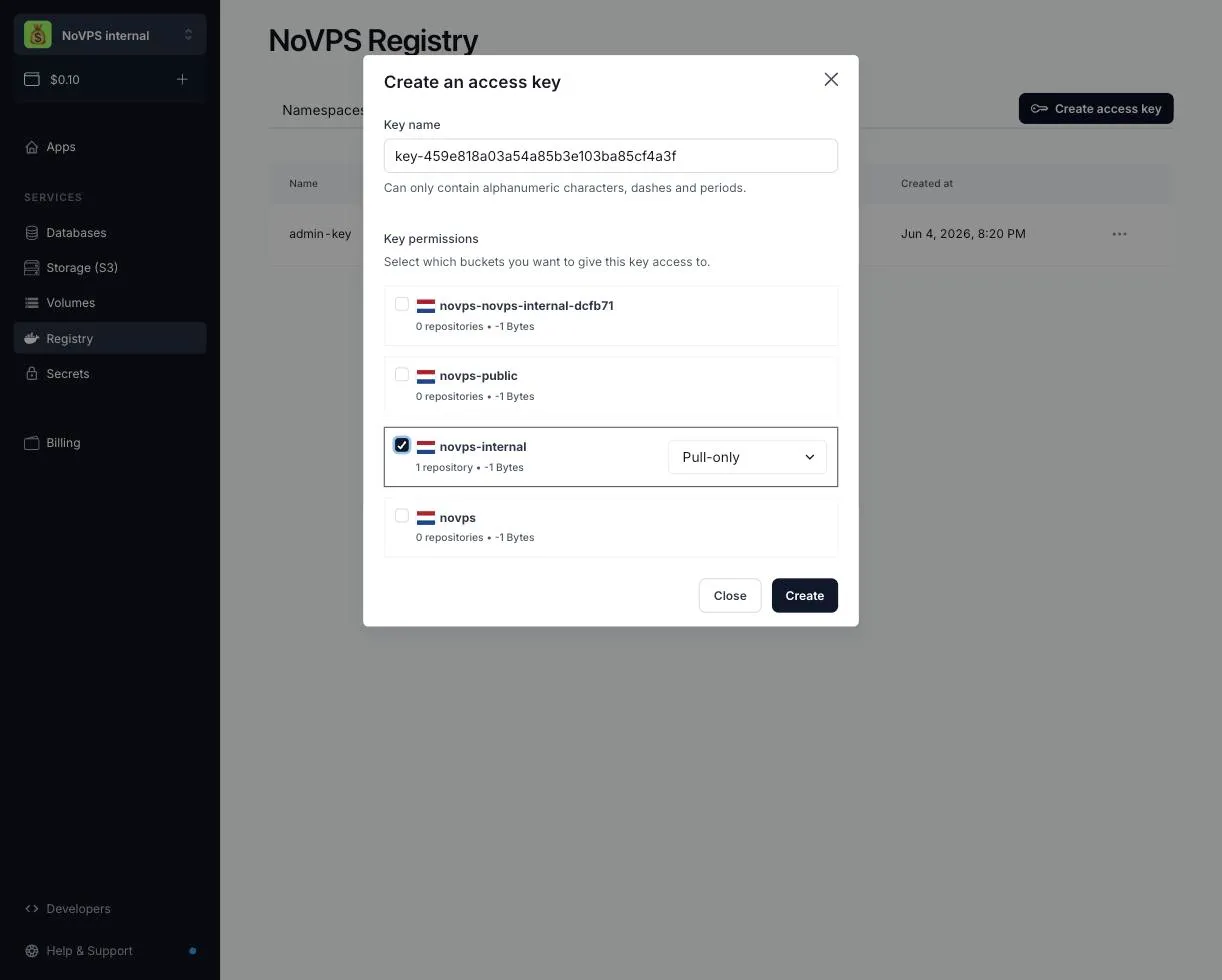
- Click Create. The dialog shows the Key ID and the Secret key.
Save the secret key securely right away. It is shown only once and cannot be viewed after you close the window. If you lose it, use Regenerate key in the key’s menu to get a new secret.
The Key ID is also shown in the Username column of the Access Keys list, and can be copied from there at any time.
Step 2. Log in with Docker
Use the Key ID as the username and the secret key as the password:
docker login nl.registry.novps.app -u <KEY_ID>Docker will prompt for the password; paste the secret key. In CI, pass the secret through an environment variable instead of typing it:
echo "$REGISTRY_SECRET" | docker login nl.registry.novps.app -u <KEY_ID> --password-stdinStep 3. Tag and push the image
Tag the image with the full name nl.registry.novps.app/<namespace>/<repository>:<tag> and push it. The repository is created automatically on the first push.
docker tag my-api:1.4.2 nl.registry.novps.app/my-super-project/api:1.4.2docker push nl.registry.novps.app/my-super-project/api:1.4.2If you build with docker build, you can tag the image right away:
docker build -t nl.registry.novps.app/my-super-project/api:1.4.2 .docker push nl.registry.novps.app/my-super-project/api:1.4.2Step 4. Check the image in the dashboard
Open the namespace in the Registry section. The repository appears in the list with the time of the last push.
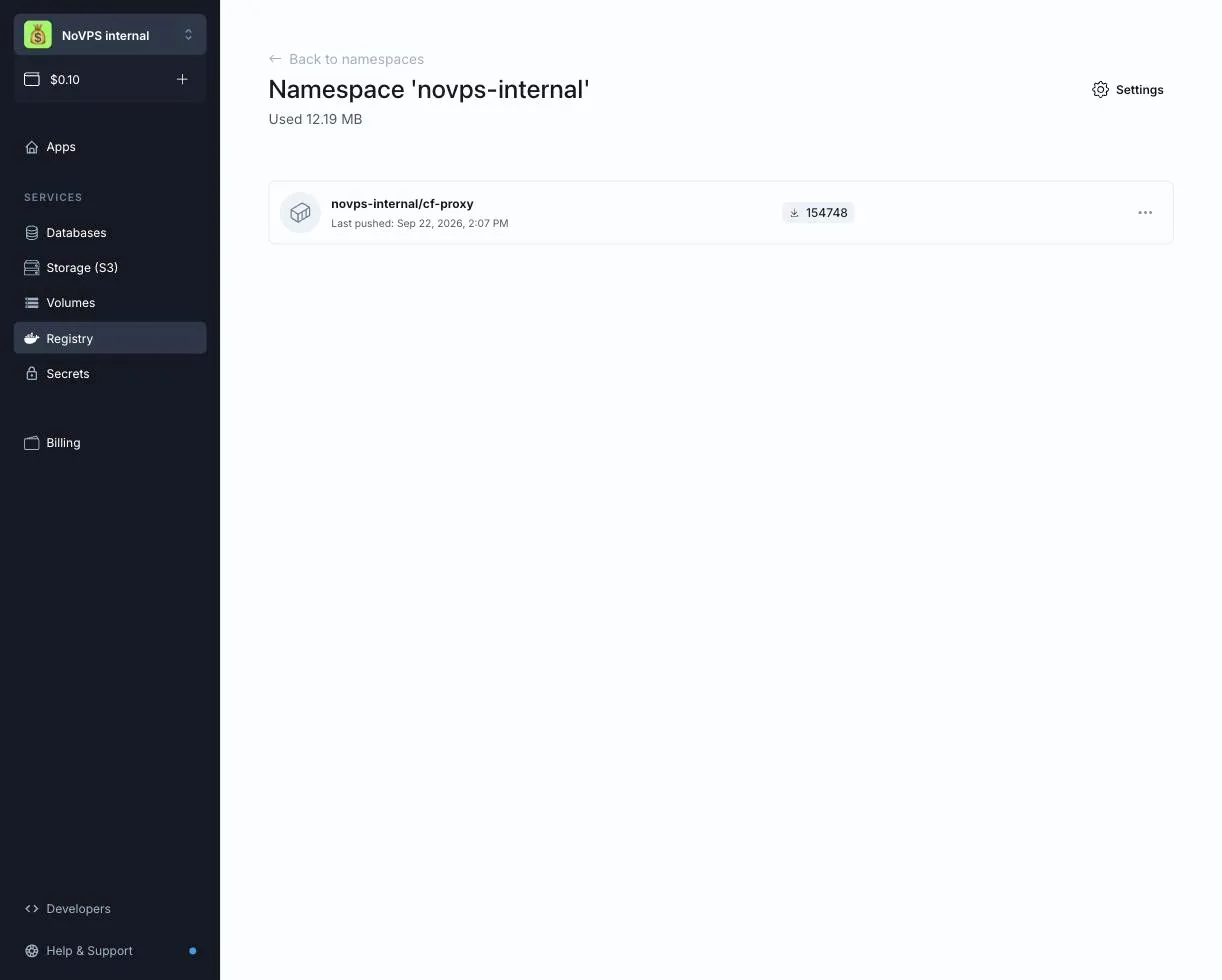
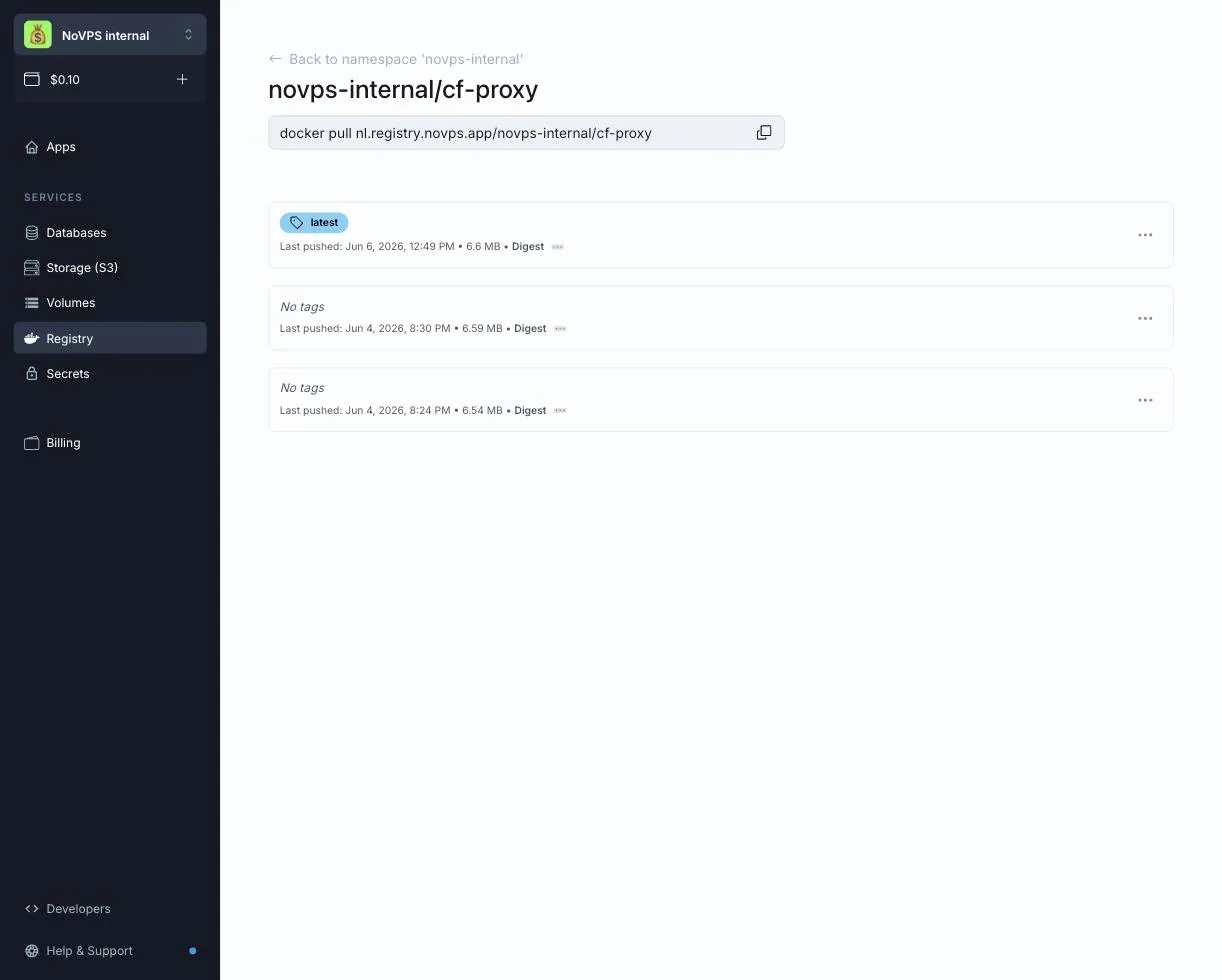
Click the repository to see its images. Each entry is a digest with its tags, size and push time. The ready-to-use docker pull command is shown at the top of the page, and a click on a tag copies the pull command for that tag.
Step 5. Deploy the image
When you create an application or a resource, specify the full image name, for example nl.registry.novps.app/my-super-project/api, and the tag. Because the registry is private, provide credentials in the form KEY_ID:SECRET. Use a separate Pull-only key for this, so that a compromised deploy token cannot push or delete images.
A resource follows the tag it was created with. Pushing a new image under the same tag is enough to roll out a new version.