
How to delete images and namespaces
How to remove an image digest, a repository, an access key or a whole namespace from the registry
All deletions in the registry are permanent and cannot be undone. Make sure no running resource depends on the image you are about to remove.
Delete an image (digest)
- Open the Registry section, click the namespace and then the repository.
- Find the digest you want to remove. Each entry shows its tags, size and push time.
- Open the ⋯ menu on the right of the entry and choose Delete.
- Confirm the deletion.
Deleting a digest also deletes all tags that point to it. Entries marked No tags are untagged images, usually previous versions of a tag that was pushed again; they still take up storage and are safe to remove if nothing pulls them by digest.
Delete a repository
- Open the namespace in the Registry section.
- Open the ⋯ menu on the right of the repository and choose Delete.
- Confirm the deletion. All images in the repository are removed.
Delete an access key
- Open the Access Keys tab of the Registry section.
- Open the ⋯ menu on the right of the key and choose Remove.
- Confirm the deletion. Any client that was using this key loses access immediately. If you only need a new secret, choose Regenerate key instead.
Delete a namespace
- Open the namespace and click Settings, or choose Settings from the ⋯ menu in the namespace list.
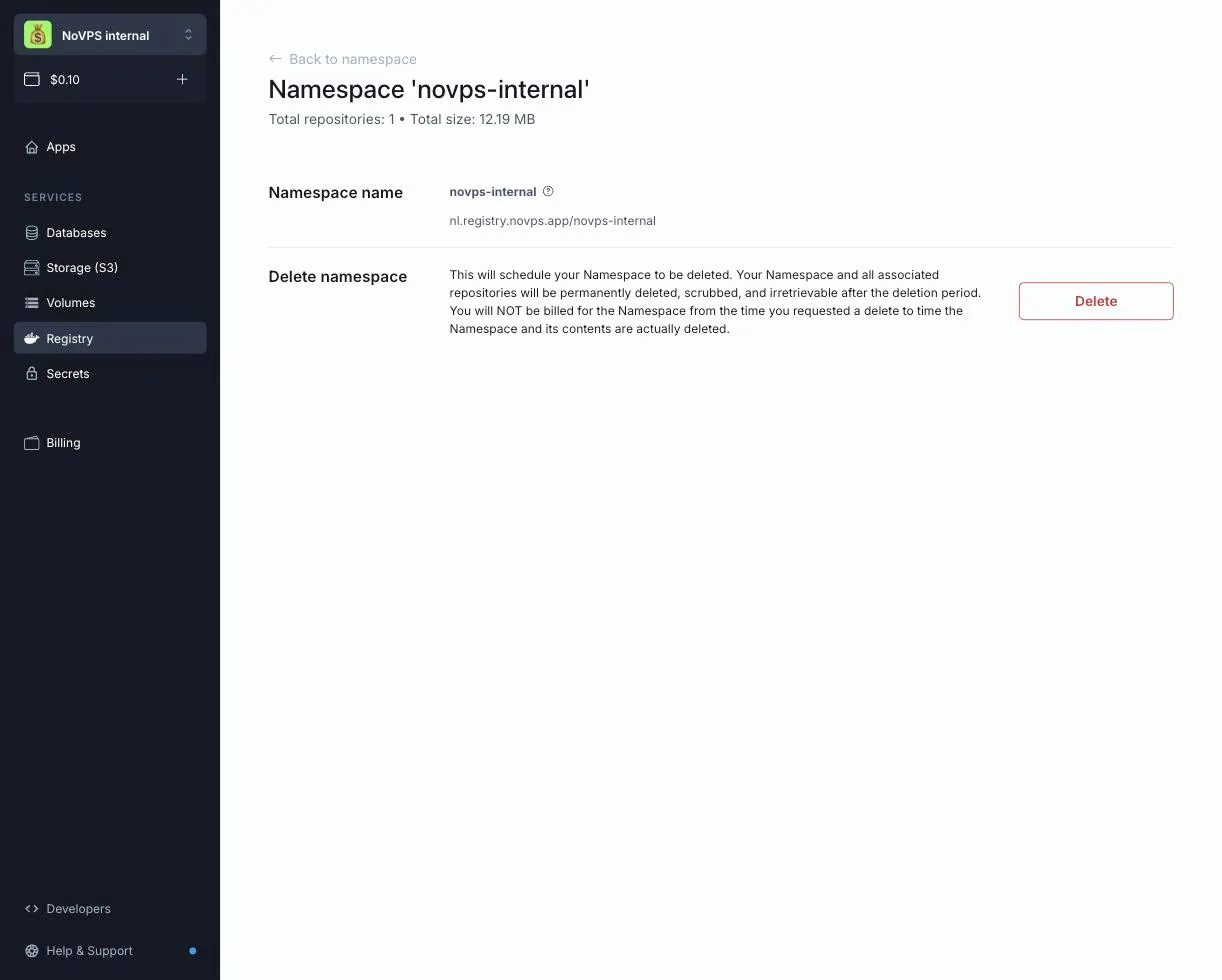
- In the Delete namespace section click Delete.
- Type the namespace name in the confirmation dialog and confirm.
The namespace and all its repositories are scheduled for deletion and are permanently removed after the deletion period. You are not billed for the namespace from the moment you requested the deletion.
If the Delete option is disabled, your role in the project does not allow deleting namespaces. Please contact the project owner.